How to Set Up and Maintain a Sterile Laboratory
A sterile laboratory is one of the most important tools in microbiology. The success of any experiment depends on the ability to control and monitor all variables precisely. This means food, water, environment and more importantly cleanliness of everything involved in an experiment. The importance of maintaining a sterile lab cannot be overstated, as it can affect the viability of an experiment, resulting in failure to obtain the desired results.
A microbiologist working at a sterile environment should always take steps to ensure it is absolutely clean before beginning any experiment. Once the microbiology lab has been set up, all tools should be sterilised regularly, following outlined sterile procedures by laboratory manuals or standard operating procedures (SOP). Proper sterilisation will ensure a safe and successful experiment.
What is the Sterile Technique?
A sterile technique is one in which all bacteria, spores, viruses are eliminated. Sterile techniques are used for tissue cell culture, embryo manipulation, cell fusion, and other types of biological work that require sterility or asepsis. When working with cell cultures and bacteria that require bacteriological grade technique, it would be necessary to have germicidal soap and solutions for sterilisation.
Here Are Some Useful Equipment And Tips When Setting Up A Sterile Laboratory:
1. Bunsen Burner
Use a Bunsen burner to heat up all equipment used in the experiment. This includes sterile pipettes, gloves, sterile tubes and any other equipment involved in the process that comes into direct contact with normally non-sterile food products, such as broth or agar plate. Equipment must be sterilised before being placed in the microbiology lab.
2. Autoclave
Use an autoclave to clean all equipment used in the experiment. This includes sterile flask, test tube, sterile pipettes, and any other disposable items involved in the experiment that come into contact with non-sterile solutions during preparation or processing. The use of an autoclave will ensure the equipment is completely sterilised, and will not introduce contaminants such as E. coli or Salmonella to your experiment.
3. Laminar Flow Hoods
Use a laminar flow hood to work with any plates for experiments in microbiology. The use of a laminar flow hood will ensure proper air flow, which reduces the risk of any contaminants being introduced to the experiment. It will also ensure that all agar plates are properly sterilised before performing experiments with them to ensure successful results.
4. Alcohol Lamp
Use an alcohol lamp (or Bunsen burner) to sterilise or decontaminate needles every day in the microbiology lab. This is especially important in the event of accidental pricks on fingers or hands that occur during experiments. Needles must be decontaminated before they are placed back inside the drawer to ensure safety.
5. Bleach Solution
Thoroughly wipe down all surfaces in the microbiology laboratory at least once a week using bleach solution, following protocols indicated for each experiment performed weekly. This will prevent contaminants from building up on the work surface, ensuring a safe working environment where products/contaminants are not introduced to the experiment.
6. Microscope
Use a microscope to inspect all agar plates before experiments for microbial growth, or presence of contaminants such as yeast and mold. This will ensure that all agar plates used in experiments are free from unwanted microbes and other elements, which could contaminate future experiments. The use of this lab equipment will also prevent contaminated results, saving time and money.
7. Spray Bottle
Use a spray bottle to sterilise all surfaces before working with agar plates and other equipment used in experiments. This is an important step in the successful execution of microbiology experiments, as it ensures no contaminants are introduced to the agar plate or any equipment used during the experiment.
8. Disinfectant
Use disinfectant to sterilise surfaces, tools and equipment that come into contact with non-sterile products during the experiment. This will reduce any risk of cross-contamination or other microbial contamination of future experiments. Follow guidelines for proper use of each product involved in the experiment to ensure successful results.
9. Autoclave tape
Every autoclave should be equipped with a strip of sterilising autoclave tape. This will indicate if the contents inside the autoclave have been properly and completely sterilised, ensuring successful hygienic results when performing experiments in microbiology.
10. Biological Safety Cabinet (BSC)
A Biological Safety Cabinet (BSC) is designed to protect the researcher from exposure to hazardous biological materials, as well as reduce any chance of contamination due to outside variables. This will increase the safety and integrity of experiments within the microbiology lab by controlling contaminants via a filtered, laminar airflow system. A BSC should be used when handling most primary cells, including stained antibodies.
Personal Protective Equipment
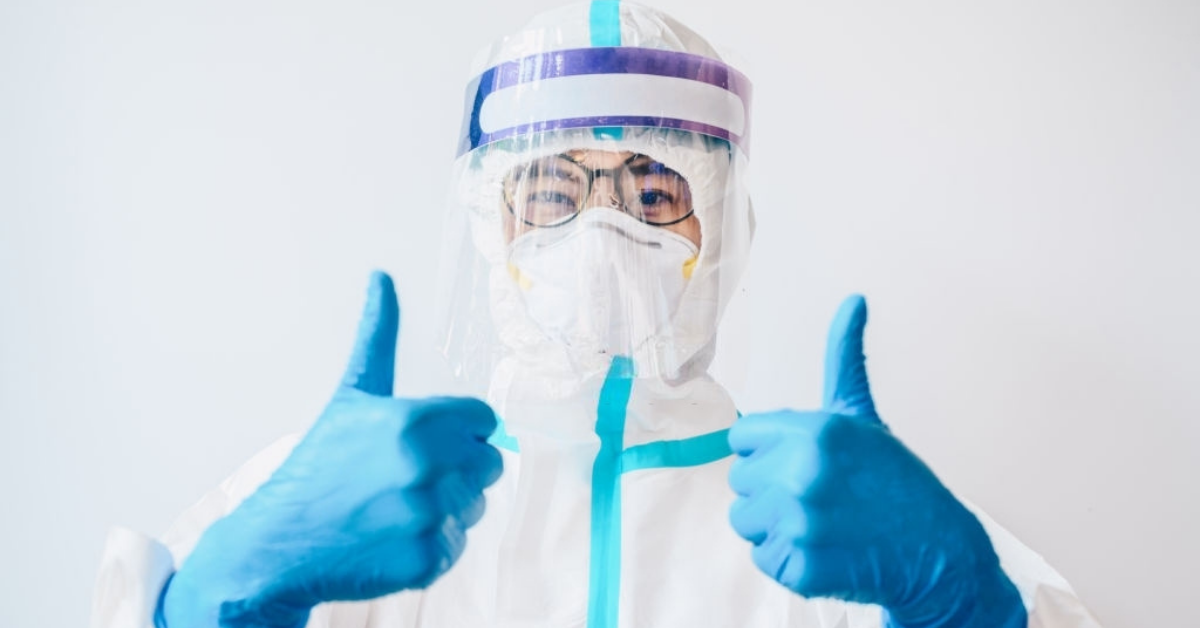
1. Hairnet/Medical Cap – Use a hairnet or medical cap in the microbiology lab to ensure no hair is present on other laboratory surfaces or equipment used for experiments. Hair can carry contaminants that could lead to contaminated results, which could lead to failed experiments and waste of time and money.
2. Face Shield – Use a face shield to guard against contamination, which could otherwise enter the experiment through the mouth. A face shield will ensure no contaminants are introduced via direct contact with skin or hair during experiments.
3. Medical Mask – Wear a medical mask in the microbiology lab to protect yourself from contaminants during experiments. This will ensure no microbial contamination is introduced into any agar plates or equipment used during experiments by way of your mouth, nose or hair.
4. Goggles – Wear goggles when performing experiments in microbiology to prevent contaminants from entering the eyes during experiments. This will help ensure that no products or microorganisms are introduced into experiments by the eyes, which could otherwise enter via skin or hair.
5. Laboratory Coat – Wear a laboratory coat to protect yourself from contaminants during experiments, as well as to reduce any risk of contamination. The lab coat will also protect against contaminants, such as dust particles, which could otherwise enter the experiment by wearing clothing.
6. Long Pants – Long pants are recommended in the microbiology lab to protect legs from contaminants entering experiments through direct contact with bare skin. This will reduce the risk of contamination by hands or feet during experiments.
7. Wear Disposable Gloves – Wear disposable gloves in the microbiology lab to ensure protection from contaminants introduced via touch during experiments. This will protect agar plates and equipment from any microbial contamination that may otherwise occur, as well as protection against skin contact with products or experiments inside the lab environment. Wearing disposable gloves will also help avoid cross-contamination during experiments.
8. Wear Closed-Toe Shoes – Wear closed-toe shoes at all times in the microbiology lab to protect yourself from contaminants introduced through direct contact with your feet. Closed-toe shoes will also protect against any microbes present on the floor of the microbiology lab, ensuring that contamination does not occur during experiments by direct contact with the shoes.
How to prevent contamination? – To prevent contamination by airborne particles, a workbench or laboratory table should be covered with disposable material, such as plastic. The walls and the floor must be made of smooth material that can easily be cleaned. In addition, the laboratory should have a fume cupboard for sterilisation procedures, and an exhaust system to remove room air should be employed if the work involves anaesthetic or carcinogenic vapours.
How to minimize contamination? – The best way to minimise contamination is aseptic technique. This involves a properly set-up and maintained sterile equipment or clean room with laminar airflow, bactericidal air filtration, gowning procedures and the use of sterile instruments. In addition, all wastes from the work surface should be autoclaved before removal from the area, and all cultures should be obtained from a known, reliable source.
Important Steps In Maintaining An Effective Sterile Procedure During Experiments
Number 1 – Wear personal protective equipment, such as face masks and gloves, at all times while in the lab. It is scientifically proven that viruses can’t survive for more than 48 hours on inanimate objects, such as tables, sterile glass or walls. However, be sure to wear goggles to protect your eyes from any splashes.
Number 2 – Clean the room using a 5% bleach solution and Lysol spray to kill off any bacteria or fungi on surfaces exposed during experiments. The best time to clean your lab is at night, as ultraviolet light can damage some living organisms and cause them to mutate or reproduce faster.
Number 3 – Wipe down all lab equipment used during experiments every day after use with 70% isopropyl alcohol, taking care not to touch anything other than gloved hands or the sterile surface of the equipment itself. After wiping down your lab equipment, store it in a clean plastic bag and label it for future use.
Number 4 – Eliminate all unnecessary items from the lab, such as paper towels, cotton swabs, test tubes and Petri dish, to prevent contamination of laboratory surfaces with unwanted microbes.
Number 5 – Keep all surfaces free of excessive moisture. Wipe up spills immediately, and wipe down wet areas on countertops with a bleach solution to prevent the spread of germs.
Number 6 – Avoid using lab equipment for purposes other than its intended use. For example, if an unwrap sterile pipettes is only used to transfer liquids from one container to another, do not use it to stir, mix or scoop anything. When in doubt whether lab equipment can be used for other purposes, consult a microbiologist.
Number 7 – Throw away all contaminated Petri dishes and test tubes after using them to avoid the spread of microorganisms from one experiment or procedure to another. Always include a sterile swab along with your samples.
Number 8 – Filters on air vents should be covered with a fine mesh screen at all times, to prevent dust, dirt and microorganisms from entering the lab.
Number 9 – Seal all windows with aluminium foil to prevent ultraviolet light from entering the lab during experiments or overnight cleaning sessions.
Number 10 – Cleanse hands immediately after coming out of a glove using an alcohol wipe or hand sanitiser (immunity only lasts as long as your skin is wet). Replace sterile gloves every day before entering the lab, and discard them after use. Never re-use gloves and avoid other non-sterile surfaces.
Number 11 – Throw away all objects and materials that come into contact with potentially infectious materials (blood, urine, faeces, etc.) in the appropriate waste receptacles, and clean up any spills immediately using a bleach solution or other disinfectant.
Number 12 – After washing your hands, avoid touching anything until they are dry, to ensure no microorganisms transfer from one area to another.
Number 13 – Wash hands with soap and water before leaving the lab at night. Make sure all equipment is turned off and the fume hoods have been switched off for at least 20 minutes before switching them off yourself, to ensure that any residual fumes have dispersed.
Number 14 – Last and final step is turning off the laboratory lights before leaving the lab for the day. Do not turn them back on until you have entered the lab and taken all appropriate infection control precautions to avoid unnecessary risk of contamination.
Number 15 – When carrying out experiments, follow the standardised protocol strictly in accordance with your training.
Microbiological laboratories are environments that require high cleanliness and attention to detail to maintain a sterile environment for experiments.
By following these steps, you can ensure your microbiology lab remains free from contamination.
What is Aseptic Technique?

An aseptic technique is one in which only the microorganisms that don’t harm laboratory cultures and biological material are within the area. There must be no chance of outside contamination by the materials used in the area and in handling any specimens or cultures that enter this lab space. For example, when working with cultures and bacteria that require bacteriological grade technique, it would be necessary to have germicidal soap and solutions for sterilisation.
Benefits of Aseptic Techniques in Microbiology laboratory

To begin with, aseptic technique is used in most microbiological experiments because it allows for increased accuracy and precision when trying to determine the number of cells or organisms present in a sample, which is critical when working with microscopic samples. In addition, aseptic technique allows greater certainty of the purity of a sample, which is important if you’re working with cultures. Finally, when proper precautions are taken regarding sterile sampling and Petri dishes, it is possible to avoid many biohazards, such as food spoilage and contamination, that could potentially lead to harmful conditions like salmonella or tuberculosis.
The aseptic technique is important in microbiology, as most microorganisms are harmful to human health and the environment. Without this technique, microbes harmful to humans may enter the lab space and contaminate different cultures. For example, bacteria such as Staphylococcus Aureus can cause diseases ranging from minor skin infections to life-threatening sepsis in some cases. Therefore, strict aseptic technique must be observed when handling samples that may contain harmful microbes to ensure no contamination occurs.
Observing the aseptic technique in microbiology may be tedious and time-consuming, but it is necessary to maintain clean cultures of microorganisms. The process involves thoroughly washing hands with germicidal soap before entering the lab space; cleaning bench tops with disinfectant prior to work; working with disinfected pipettes, tips, and tubes; using sterilised water for solutions, so on and so forth. This may be cumbersome for some people, but following these practices will maintain clean cultures of microorganisms.
This technique is extremely important in the case of performing experiments on potentially pathogenic bacteria. For example, if certain experiments require a flask with bacterial culture, it is necessary to ensure that the flask does not come in contact with any chemical or dust particles before use. This can be achieved by double-bagging the flask and sterilising it by autoclaving at 15lbs/sq in for 20 min, after which it should be allowed to cool down before opening the bags.
The aseptic technique is necessary not only for bacteria experiments, but also in molecular cloning. For instance, when inserting genes into bacterial plasmids, it is important to ensure that the environment where this work is carried out is free of all contaminants, since these can affect the efficiency of the transformation process. This means the lab bench used for work must be cleaned and disinfected, and the person performing the experiment must wear gloves and wipe all surfaces with 70% ethanol before starting. Furthermore, care should be taken while using pipettes and any bacteriological material, since contamination of the cultures can lead to loss of time, money and many experiments.

